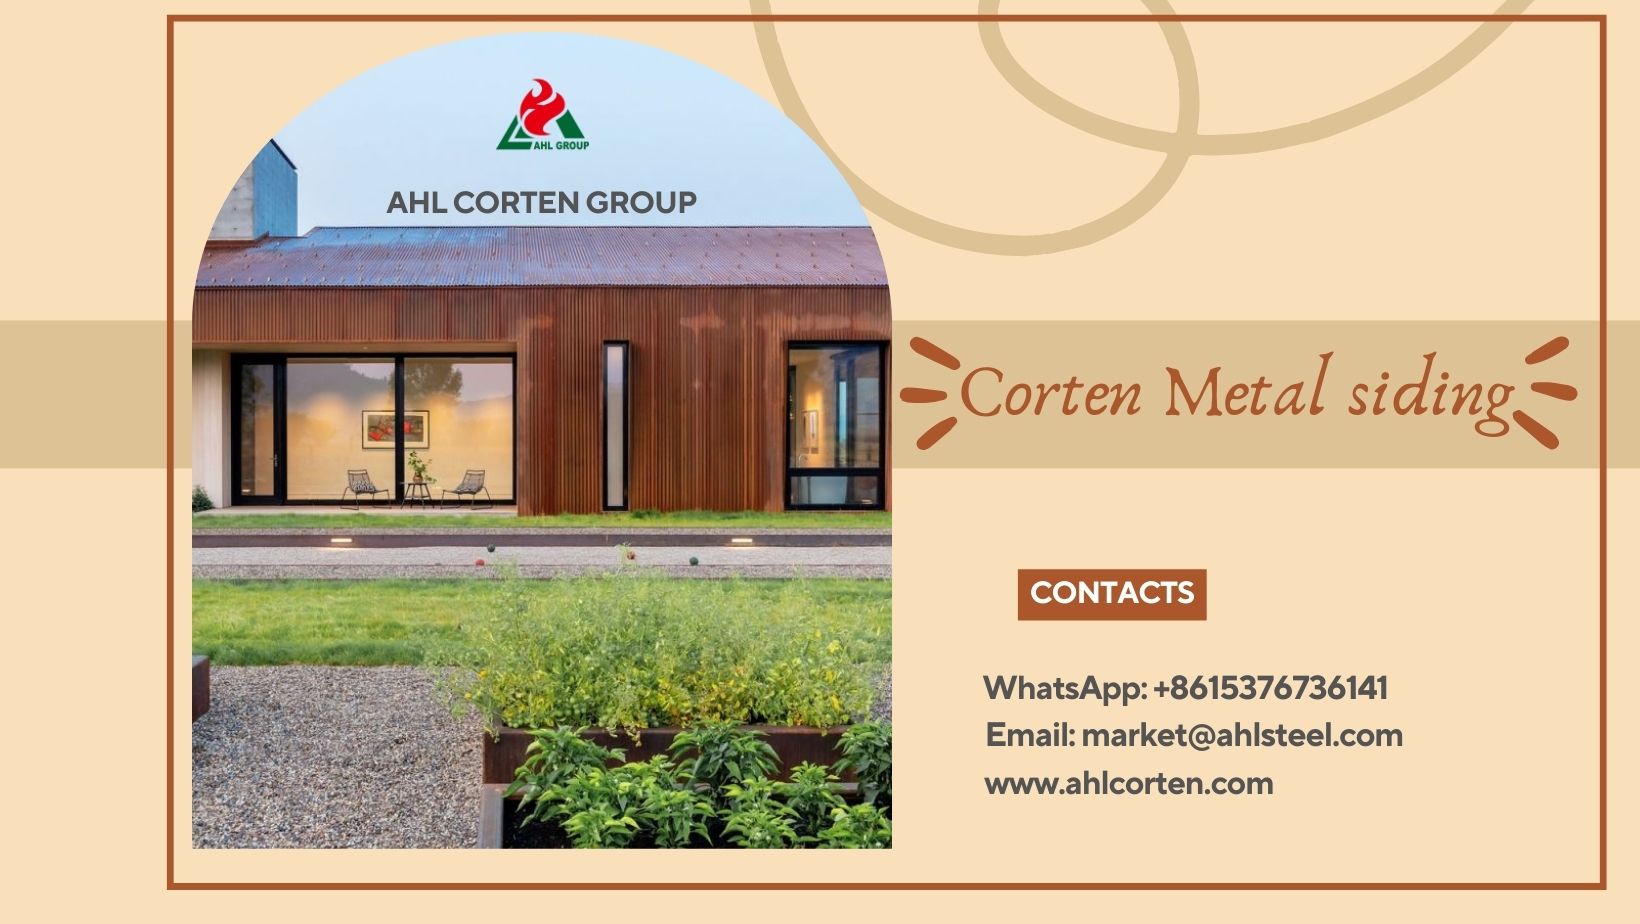
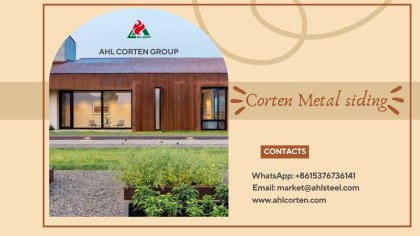
How to Cut Corten Steel Panels at Home
Weathering steel, with its distinctive orange-brown rust patina, has become a popular material in contemporary landscape architecture and residential design. Whether installing weathering steel cladding for garden features or laying weathering steel siding panels for house extensions, on-site precision cutting is often an essential step.As a manufacturer with years of experience supplying weathering steel for curtain wall projects, I frequently receive client enquiries: " Will cutting weathering steel at home damage its surface texture?" The answer is yes—provided you have the right tools and employ scientific techniques, you can achieve clean cuts.
Cutting corten steel wall cladding at home is not difficult, but precision is key to preserving the material's structural integrity while retaining the distinctive rust patina characteristic of cladding. This guide shares professional yet DIY-friendly cutting methods to help you tackle the task with ease.
Whether you're a DIY enthusiast or a homeowner embarking on a Corten steel project, this expert guide will enable you to cut rusted steel claddings like a professional. This ensures your cladding project achieves both aesthetic appeal and durability, with a lifespan spanning decades.
Cutting Corten Steel Cladding: Why Precision Matters
Corten steel is an alloy material whose defining characteristic is its ability to form a stable, protective rust layer. Improper cutting can cause irreversible damage, primarily manifesting in three ways:
1. High-Temperature Discolouration Impeding Patina Formation
Overheating of cut edges disrupts the normal formation of the protective rust layer. This not only compromises the aesthetic appeal of corten steel wall cladding but also diminishes its corrosion resistance and durability, degrading the rusted steel cladding's integrity and adversely affecting the overall project outcome.
2. Compromised Structural Integrity
Jagged, uneven edges post-cutting heighten the risk of premature localised corrosion in the cladding, shortening the overall service life and compromising the project's structural stability.
3. Potential Safety Hazards
Corten steel's high density generates high-velocity sparks and fine metallic dust during cutting. Without adequate protective measures, this poses a significant risk of accidents.
Essential Tools and Materials for Cutting Steel Panels
1. Cutting Tools (DIY-Friendly + Professional)
Selecting appropriate tools based on cutting scenarios and requirements significantly enhances efficiency and results:
- Angle grinder (DIY preferred): Suitable for minor adjustments, curved cuts, and on-site repairs of Corten wall cladding. Recommended blades: 1mm thin diamond blades or reinforced grinding discs.
- Metal-cutting circular saw (optimal for straight cuts): Preferred for cutting large-area weathering steel siding panels, producing clean edges approaching factory standards.
- Recommended blades: Metal-ceramic or carbide-tipped metal-cutting blades.
- Plasma cutter (professional choice): Suitable for cutting intricate patterns or artistic shapes on weathering steel wall cladding; portable models meet advanced DIY project requirements.
Corten Cladding Panels Marking and Fixing Tools
- Marking Tools: Silver-lead welding pencil or permanent marker (ordinary pencils are invisible on rusted cladding); for pre-weathered panels, apply masking tape before marking to avoid scratching the surface rust layer.
- Fixing Tools: Heavy-duty C-clamps to securely fasten corten steel siding panels to a stable workbench, preventing movement during cutting.
Essential Safety Equipment
Comprehensive protection is mandatory when cutting weathering steel to eliminate safety hazards:
- P100 dust mask: Prevents inhalation of alloy dust generated during cutting.
- Face shield: Blocks high-velocity sparks (particularly common when cutting Corten steel siding panels), preventing facial burns or damage to surrounding items.
- Hearing protection: Reduces noise from metal cutting (significantly louder than wood cutting).
- Cut-resistant gloves: Prevent cuts from sharp panel edges while protecting hands from heat exposure.\
Preparatory Work Before Cutting Corten Cladding
1. Measuring and Marking Cutting Lines
Pre-cutting marking work directly determines cutting precision and requires exceptional meticulousness:
- Repeated measurement and precise marking: Adhere to the principle of ‘measure twice, cut once’ to ensure dimensional accuracy, avoid wastage of procured Corten steel panels for sale, and control project costs.
- Clearly define marking lines: Employ silver-lead welding pencils or permanent markers. For pre-weathered cladding, apply masking tape before marking to ensure visible lines while safeguarding the surface rust layer from scratches.
2. Corten Cladding Panel Cutting Work Area Preparation
Select a well-ventilated, spacious area distant from flammable materials (sparks from cutting pose fire hazards).
Ensure the workbench is stable and level to minimise vibration during cutting, safeguarding precision.
Clear debris from the area to prevent tripping hazards while reserving ample space for smooth cutting operations.
3. Securing Corten Steel Panels
Panel stability during cutting is crucial for achieving clean, straight cuts; securing steps must not be overlooked:
Firmly clamp the Corten cladding panels to the workbench using heavy-duty C-clamps to prevent panel movement during cutting.
Ensure the cutting area is fully supported to prevent blade jamming and irregular cuts.
Step-by-Step Guide to Cutting Corten Steel Panels at Home
Step 1: Prepare Corten Cladding Panel Cutting Tools
- Angle Grinder: Fit an appropriate blade (1mm thin diamond blade or grinding disc) and verify the blade is securely fastened with no play.
- Circular Saw: Fit a metal-ceramic or carbide-tipped metal-cutting blade. Adjust the cutting depth according to the panel thickness.
- Plasma Cutter: Calibrate the voltage and gas pressure parameters to suit the Corten steel wall cladding thickness, ensuring stable cutting performance and clean edges.
Step 2: Execute Cutting Smoothly and Controlled
Maintain a steady rhythm throughout cutting, avoiding hasty operations. Specific techniques are as follows:
- Angle Grinder: Allow the tool's weight to apply pressure naturally without deliberate force. Move back and forth along the marked line to distribute heat evenly, preventing localised overheating that could damage the Corten wall cladding edges.
- Circular saw: Maintain a steady, moderate cutting speed. Excessive speed may cause burrs, while insufficient speed risks localised overheating that damages the rust layer on the edges of Corten steel siding panels.
- Plasma cutter: Keep the torch at a consistent distance from the panel, moving steadily along the marked line to ensure a clean, smooth cut.
Step 3: Post-Cutting Edge Treatment
Post-cutting edge treatment mitigates safety hazards while preserving panel performance:
- Deburring: Smooth sharp edges using a metal file or flap disc on an angle grinder. This critical step prevents moisture accumulation at burrs, averting uneven corrosion on the weathering steel cladding.
- Dust Removal: Wipe the cut edges and Corten cladding panel surfaces with a dry cloth to thoroughly remove metal dust and debris, preventing dust adhesion that could affect subsequent installation.
Key Maintenance Points for Cladding After Cutting
1. Corten Steel Panel Surface Cleaning
After cutting, promptly clean the panels: Thoroughly wipe the Corten steel panels with a dry cloth to remove all metal dust and debris. Avoid immediate water washing to prevent premature rusting of fresh edges where the rust layer has not yet formed.
2. Accelerating Rust Layer Formation on Cut Edges
Freshly cut edges (exposed bare steel) may exhibit colour inconsistency with existing rust layers. A simple method to accelerate oxidation is to spray a mixture of water, salt, and white vinegar onto the edges. This solution hastens rust layer formation, enabling the edges to blend with the rust patina of the surrounding cladding within days.3. Optional Protective Coating Treatment
Should temporary delay of rust formation be required (e.g. to facilitate subsequent installation alignment), apply a thin layer of temporary protective oil to the edges. Prior to final installation, ensure this protective oil is thoroughly wiped away to permit natural rust formation on the weathering steel.
Why Choose AHL Group as Your Steel Panel Supplier
1. High-Quality Corten Cladding Panels
We supply premium weathering steel panels in thicknesses ranging from 1.5mm to 3mm, ideal for residential siding and garden cladding applications. Crafted from superior materials, these panels offer low cutting difficulty at home and are engineered for extended service life with exceptional durability.
2. Expert Technical Support for Corten Steel Panels
Our expert team provides personalised guidance covering the entire process of cutting, installing, and maintaining weathering steel panels. Whether you're a DIY enthusiast or a property owner, you'll receive professional support.
3. Consistent Supply and Competitive Pricing
We ensure a stable supply of weathering steel panels. All products are available for external sale at competitive prices, accommodating diverse project budgets. Suitable for both small DIY tasks and large-scale residential developments.
Frequently Asked Questions on Cutting Weathering Steel Panels at Home
Q1: Does Cutting Corten Steel Affect Its Weathering Properties?
A1: No, provided the process is executed correctly. Avoid overheating the cut edges (which can disrupt rust layer formation) and ensure proper edge treatment to maintain the weathering capacity and structural integrity of Corten wall cladding.
Q2: How Long Should Cut Corten Panels Be Left Before Installation?
A2: Installation may proceed immediately after completing edge treatment and cleaning. If temporary protective oil has been applied, wipe it off before installation. The rust layer on cut edges will form naturally over time, gradually matching the colour of the rest of the Corten cladding panels.
Q3: What Thickness Of Weathering Steel Panel Is Suitable For Home Cutting?
A3: Panels between 1.5mm and 3mm thick are most suitable for home cutting (standard thickness for residential siding and garden cladding). Thicker panels require professional-grade tools for cutting.
Q4: Can Ordinary Saw Blades Be Used to Cut Corten Cladding Panels?
A4: No. Ordinary blades will quickly become blunt and produce uneven cuts. Specialised metal-cutting blades with ceramic, carbide, or diamond-tipped cutting edges are essential to ensure effective cutting of Corten cladding panels.
Q5: Does Cutting Corten Steel Panels Generate Significant Noise?
A5: Yes, metal cutting produces considerably more noise than wood cutting. Always wear hearing protection when cutting Corten steel siding panels or cladding.
Ready to Customise Your Own Outdoor Corten Steel Wall Cladding?
With the right tools, precise technique, and proper safety precautions, cutting Corten steel panels at home is entirely feasible. By following the expert guidance in this article, you can achieve clean cuts while preserving the rust patina texture of your cladding, ensuring your project remains durable and visually striking for years to come. Need high-quality weathering steel panels for your home project? Browse our weathering steel panel products (available for purchase) or contact us to receive our latest catalogue and quotations for cutting weathering steel panels free of charge.
Home & Garden
- BBQ grill
- corten steel metal planter for outdoors
- garden bollards lights
- garden screens
- steel tree grates
- fire pit
- garden sculptures and statues
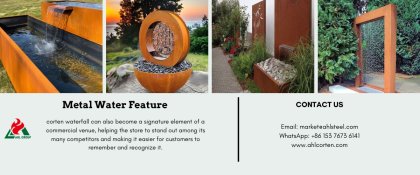
- garden water fountain
- garden edging
- bio ethanol fireplace
- Corten Fence Panels
- Corten Steel Water Features Manufacturers, Suppliers, Factory & Exporters | AHL Group
- Corten Steel Gardening Products
- Corten Steel Garden Edging
- Metal Gas Water Fire Fountain
- Corten Exterior Cladding
Mild Steel
Stainless Steel
Aluminum Sheet
Steel Processing & Services
News
-lp.jpg)
 Get a quote, Now!